Difference between revisions of "Tools"
Jump to navigation
Jump to search
(→Tools) |
(→Tools) |
||
| Line 36: | Line 36: | ||
**** <b>view map #</b> Each map has a number in front of it, use that number to view the map. (ie: view map 31) | **** <b>view map #</b> Each map has a number in front of it, use that number to view the map. (ie: view map 31) | ||
**** <b>last map</b> Bring up the last map you were looking at.<br><br> | **** <b>last map</b> Bring up the last map you were looking at.<br><br> | ||
** <span style="color:red">Chat mini-window v2.7</span><br> [ [http://s000.tinyupload.com/index.php?file_id=00262107439379836946 download] ]<br> | ** <span style="color:red">Chat mini-window v2.7</span><br> [ [http://s000.tinyupload.com/index.php?file_id=00262107439379836946 download] ]<br> | ||
*** Echos chat into a customizable mini-window.<br> | *** Echos chat into a customizable mini-window.<br> | ||
Revision as of 02:12, 17 February 2016
ZMUD Tools/Tips/Macros
"Panic/Escape" Macro
- Create a new macro, assign a button. (IE:F12)
- Enter in commands:
- flee;take recall bag;quaf recall
- (if you have them in a bag; it's best to keep two in inv)
- Then click save macro
Auto Logging
There is a system alias called "atconnect" for the value of the alias use the following:
#log {%char %time( mmm dd yy)}
What the above line does is on connection to the mud server it will start a log in the zMud folder using the character name and date.
MUSHCLIENT Tips/Tools/Macros
Tips
- Installation
- If on Windows, do not install to the Program Files folder. That is a read-only directory and will give you errors when trying to save your world (triggers/aliases/etc..)
- If on Windows, do not install to the Program Files folder. That is a read-only directory and will give you errors when trying to save your world (triggers/aliases/etc..)
- Command Stacking
- Used to being able to send multiple commands by separating them with a semicolon? This can be enabled by going to Game/Configure/Commands... and if you like using the semicolon as a shortcut for group chat, you can pick something else for it to use.
Tools
- Plugins
- Door opener/unlocker
[ download ]
- Simple script to automatically open doors for you and if locked, tries unlocking them.
- Note: It will only try opening doors if you walk into them.
- Simple script to automatically open doors for you and if locked, tries unlocking them.
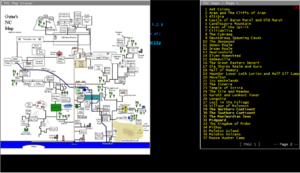
- TFC Maps v1.0
[ download ]- View every map from this wiki in-game.
- Features: Draggable map list and map viewer windows. Maps viewed inside the window are also draggable.
- Notes: Right click on the map viewer window to view large/small maps and to close the map viewer window. Map list window has a red X in the top right corner to close. Not compatible with the MSDP GUI, it will have it's own plugin sometime in the future. Commands below are to help with not having to take your hand off the keyboard as often.
- Commands:
- close map Closes the map viewer window.
- close map list Closes the map list window.
- view page # Change to a different page in the map list window. (ie: view page 4)
- view map # Each map has a number in front of it, use that number to view the map. (ie: view map 31)
- last map Bring up the last map you were looking at.
- View every map from this wiki in-game.
- Chat mini-window v2.7
[ download ]
- Echos chat into a customizable mini-window.
- Right-click on the mini-window for options.
- Commands: chats show and chats hide
- Notes: If you are seeing double of the chat channels in the main window, simply right click on the mini-window and toggle the echo. This update fixed utter/utters so it doesn't echo last message and You tell now echos properly. If you find any bugs, please write a note in-game to Fumino.
- MushClient 4.52+ Recommended
- Echos chat into a customizable mini-window.
- MSDP Prompt Bars v1.0
[ download ]
- Want just the live bars, but without the GUI? Here it is!
- Draggable Live Health/Mana/Move/Enemy bars from the MSDP GUI.
- MushClient 4.52+ Recommended
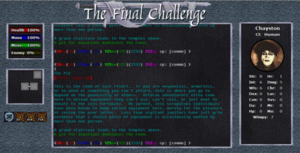
- MSDP GUI v1.9
[ download ]- Creates a GUI for The Final Challenge
- Features: Know exactly how many ticks every affected by spells last. See your equipment stats totaled up. Graphical Minimap. See where doors are without having to look. Know when you successfully hide and sneak. Live Health/Mana/Move/Enemy bars. Use your own Avatar.
- Bug: If you use the "Absorb" spell, please delete the "absorb.png" image out of the affects folder. I missed fixing that one in this version, so it could potentially cause mushclient to crash. This will be fixed in the next version.
- Installation: Extract Generic.zip into your main Mushclient folder.
- Open up your world file or create a new one.
- Add the plugin TFC_Msdp.xml (File/Plugins.../Add...) MUSHclient/Generic/worlds/plugins/TFC_Msdp.xml
- Save the world file. (File/Save World Details)
- Close the world, and reopen it. (You can do this without closing the program. Just click the tiny X in the top right corner or just go to File/Close World)
- It may take a second to load, but you should now see the GUI (Graphical User Interface)
- Since it resizes the main game window, you will need to make sure Wrap Output is checked so text doesn't go offscreen. (Game/Wrap Output). If you have a really high resolution, you can skip the wrap output steps.
- Now you need to adjust what column number it wraps the output at until text no longer goes offscreen. (ALT+5 or Game/Configure/Output...)
- Everytime you adjust the column number, connect/disconnect to see if you've adjusted it right. Personally, I find it works best at 72, but it will be different for everyone depending on their screen resolution.
- You're done!
- Open up your world file or create a new one.
- Avatars: If you would like you use your own Avatar, place it into the Avatars folder (MUSHclient/Generic/Avatars) and rename it to Default. The Avatar must be in .png format. If you do not have your own Avatar and wish to use an already made one, pick one from AllAvatars website.
- To uninstall: Remove or disable the plugin. Save the World Details, then close the world and reopen.
- Notes: Since their is no msdp stats installed serverside, I have created a workaround. After you log in, it will automatically check your equipment once to gather stats. Anytime you change your equipment or wimpy, simply check your equipment to update the stats. (eq/equip/equipment)
- Version Notes:New spell icons were causing MUSHclient to crash, reduced them down to 256 colors. Made cooldown timers more efficient. Added more spell icons, changed some old ones. Equipment stats now instantly update. Added cooldown timers when an affected by spell has 10 or less ticks. At 2 or less ticks it turns red. "show stats" alias so you can copy them if needed. Pre-release with built in stat workaround. Not all spell icons have been created, so some use a generic one. You can still see what spell it is by hovering your mouse over the icon. Minimap does not work in all rooms, however, it is still useful to see where doors are in the rooms. This is a server-sided issue that cannot be fixed client-side. Some affected by spells show multiple times (ie: bless x4 / enchant weapon x2) This is also a server-sided issue. I have made the enchant weapon icon completely black for now, as transparent wouldn't work.
- Commands: show stats
- MushClient 4.52+ Recommended
- Creates a GUI for The Final Challenge
- Door opener/unlocker
Atlantis Tip Tools/Tips/Macros
Spawns
Atlantis allows you to filter the incoming lines and redirect it to a separate window or a "Spawn". Disable the "Show new activity" option on all but the main spawn.
- Ftell Channel: In the address book create a spawn called 'ftell' and add the following patterns. This will route all the ftells to a separate window. Set the maximum lines to 100:
- Contains : ftells
- Begins with: You ftell
- Contains : ftells
- Who output: In the address box create a spawn call 'who' and add the following patterns. This will route the output of the 'who' command to a separate window. Set the maximum lines to 100:
- Matches regexp: ^(...) \[ (.+) \](.+)
- Matches regexp: ^(..) players.
- Matches regexp: ^(.) player.
- Public Channels: In the address box create a spawn call 'who' and add the following patterns. This will route the output of the 'who' command to a separate window. Set the maximum lines to 100:
- Contains: gossips
- begins with: You gossip
- begins with: You auction

